Creating and setting up of mail server on Windows is not as difficult as perceived. But if you are looking for open-source free software to create mail/SMTP server, you certainly have very few choices. One of the open-source software for Windows mail servers is hMailServer. It installs just like any other software, but configuration could be tricky. There is one more software in my knowledge for Windows, which is free, is Axigen.
In this tutorial, you will learn to install and configure hMailServer. In some other tutorial, I will discuss Axigen as well.
Requirement for hMailServer
You will need
- a domain name
- a Windows Machine. It could be Windows 10, Windows Server 2016, 2019, or any other Windows edition.
I recommend getting Windows Server from Turnkey Internet or anywhere you like, just make sure port 25 is open. Best thing is about turnkey is you can buy and apply Windows license from somewhere and pay them just for VPS. This might save some money for you.
Testing for Open Port 25 on Windows
On Windows 10 go to control panel and search for “Windows Features”

Now go to Turn Windows features on or off and look for telnet. Check the box in front of it and click OK.
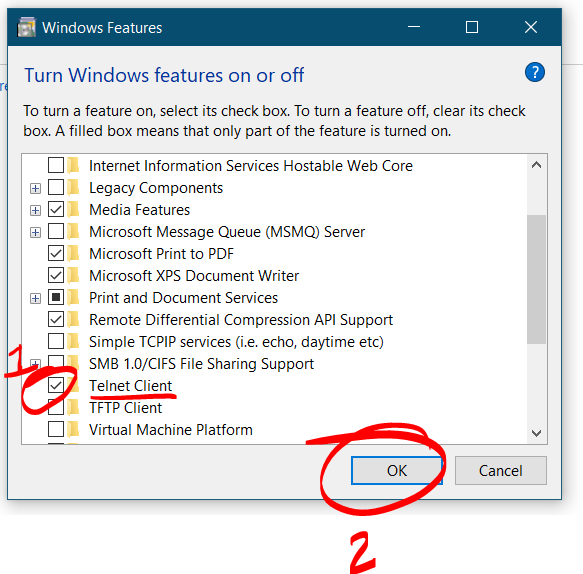
After that open command prompt and type
1 | telnet smtp.gmail.com 25 |
If you get connected message then all is well, otherwise your port 25 is blocked.
Getting & Installing hmailserver
To get hmailserver just go their website and download. Install it as any software and follow the screenshots below. During installation you will be asked to create password. This password will be needed every time you start hmailserver.
Configuring hMailServer
After installation on first run you will be asked for password to start.
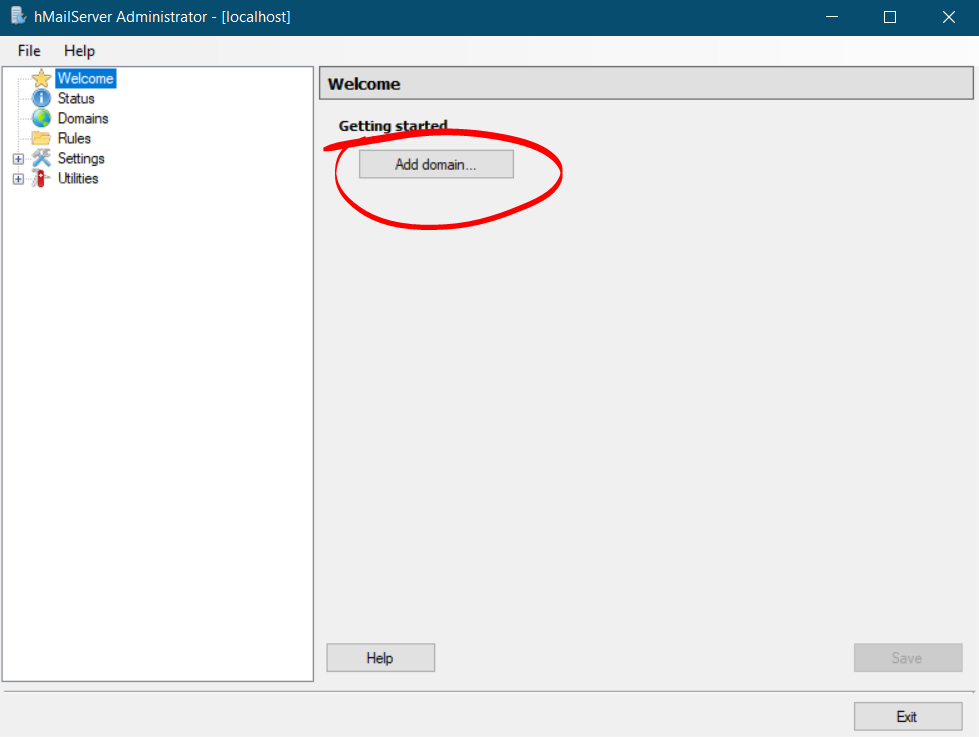
Adding Domain
After that, on next screen add domain as follows.
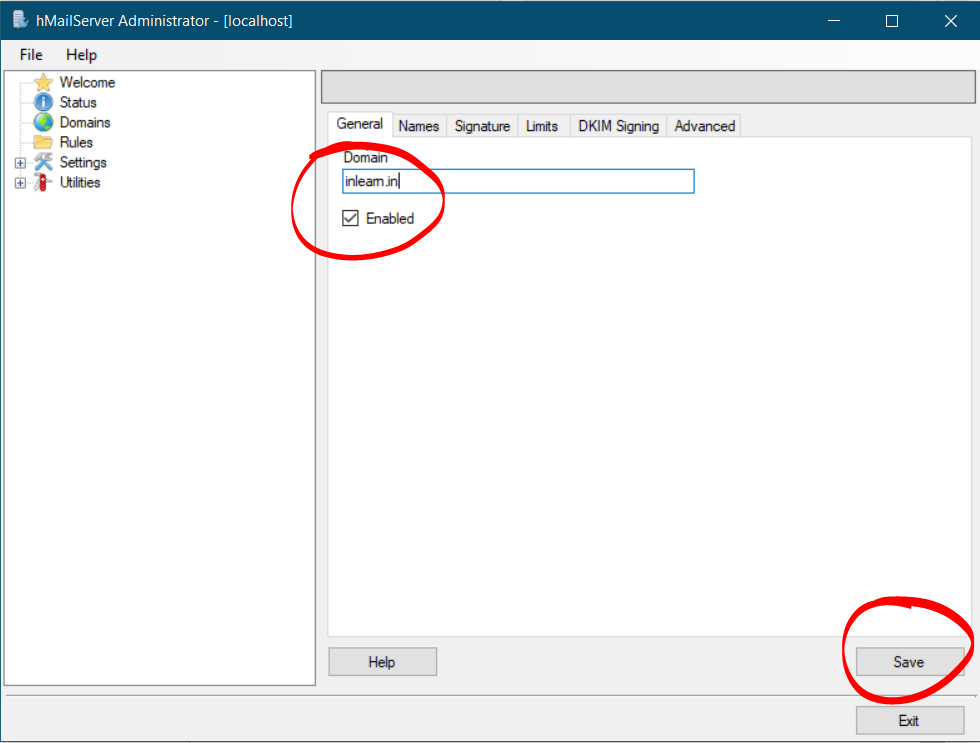
Next type the domain name and save.
Adding Accounts
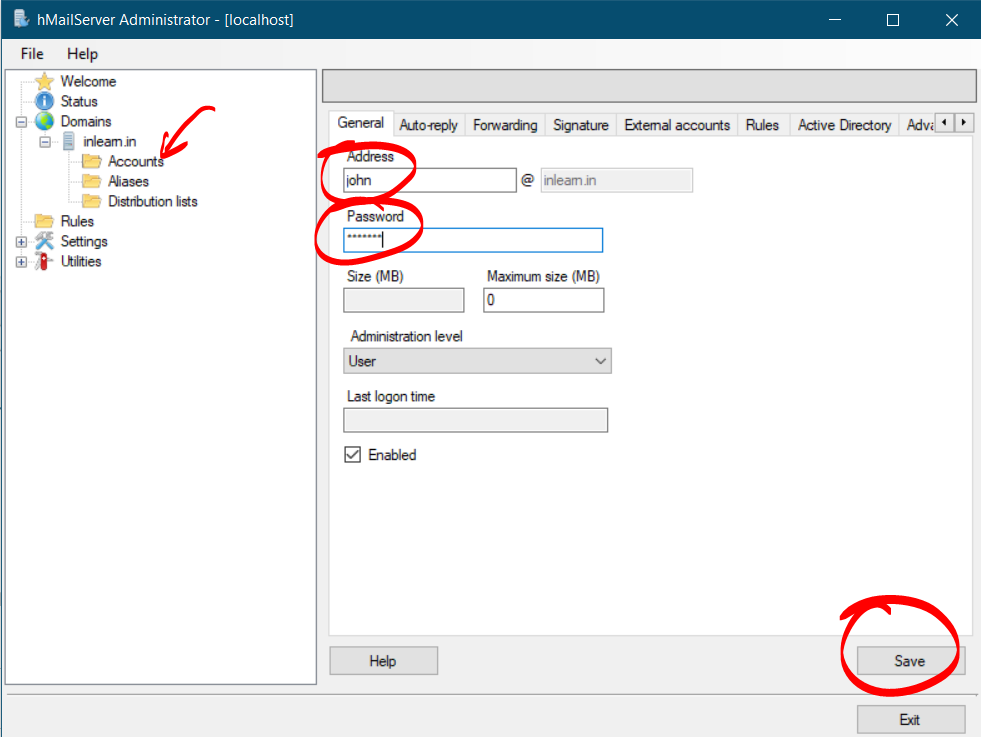
After that, you need to add account for the domain. Simply go to Accounts and then Add.
On following screen enter username and password, then save.
Generate and add DKIM key to hMailServer
In order to generate DKIM key to hMailServer, you need openssl key generator. Just download from the following link
Alternatively, you can also download it from here. Next install the openssl and open command prompt on your Windows.
Generating DKIM key on Windows
On command prompt (cmd) type
1 | cd C:\Program Files\OpenSSL-Win64\bin |
Next, execute the following command to generate the key
1 2 | openssl.exe genrsa -out dkim.private.key 1024openssl.exe rsa -in dkim.private.key -out dkim.public.key -pubout -outform PEM |
If you get any error, run cmd as administrator. You will get output as follows.
Now you will see two files at C:\Program Files\OpenSSL-Win64\bin. One is dkim.private.key and another dkim.public.key. Next, you need to tell hMailServer the location of dkim.private.key and the selector. Here you can use any alphanumeric as a selector but I am going to use mail
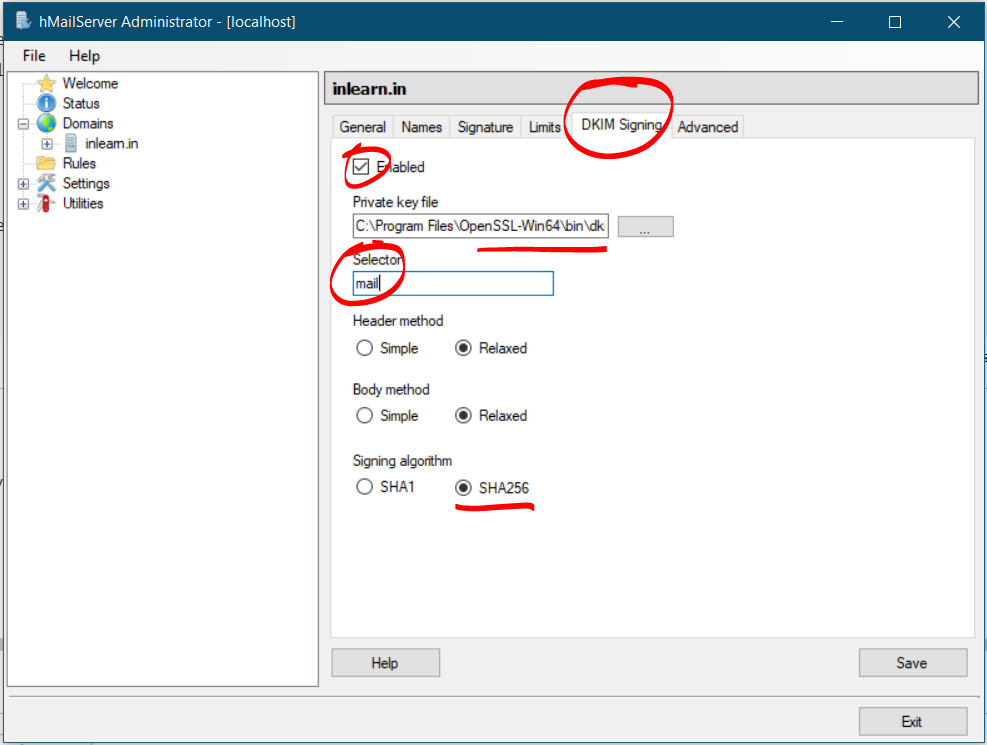
Next, you open dkim.public.key in notepad and follow the steps to create DKIM record for your domain.
Configuring DNS records
You need to create following DNS records in your domain. Login to your domain registrar and look for DNS management.
| Type | Host | Value |
| A | Your Server IP address | |
| TXT | @ | v=spf1 a mx ip4:192.168.10.10 ~all |
| TXT | _dmarc | v=DMARC1; p=quarantine; rua=mailto:dmarc@yourdomain.com; ruf=mailto:dmarc@yourdomain.com; sp=quarantine |
| TXT | mail._domainkey | v=DKIM1; k=rsa; p=MIGfMA0GCSqGSIb3DQ…………; |
After this, you can test your email server. For testing, I am going to use Thunderbird. You can also download any desktop based software to test. You can also check hmailserver outlook settings tutorial if you wanted to use outlook with hmailserver.
Enter the following SMTP details in the software.
| Host | localhost |
| User | user@yourdomain.com |
| Password | You chose |
| Port | 587 |
| TLS | None |
After that, you can send test email to your Gmail.
Conclusion
Creating MailServer on Windows would have been tedious task, but thanks to hmailserver it’s super easy. This is boon for the people, who are unable to get with nitty-gritty of Linux.