Importing the Certificate with MMC
- Open MMC on your computer (you can locate this program by typing “mmc” in your Windows search bar).
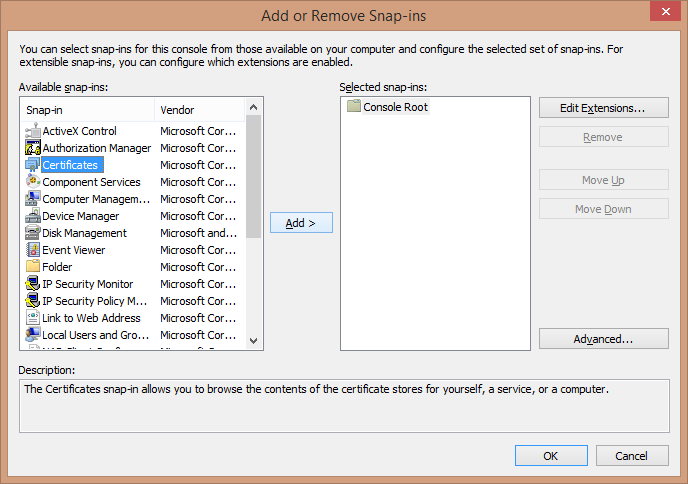
- Select “File > Add/Remove Snap-in” (or type Control-M). Select “Certificates” and click the Add button.
- Select “Computer account” and click Next…
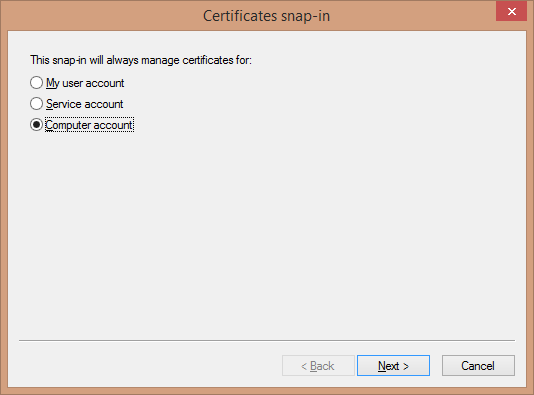
…then direct the snap-in to manage the “Local computer” and click Finish.
- Click OK to add the snap-in.
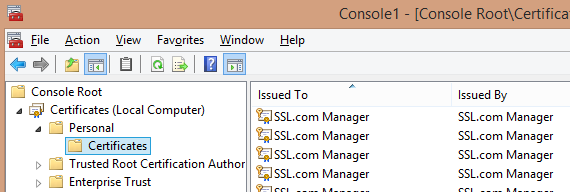
- Next, navigate to the “Certificates (Local Computer) > Personal > Certificates” folder.
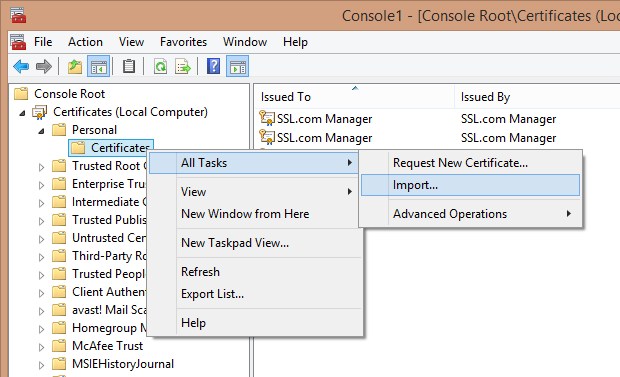
- Right-click the folder and select “All tasks > Import” from the menu to open the Certificate Import Wizard.
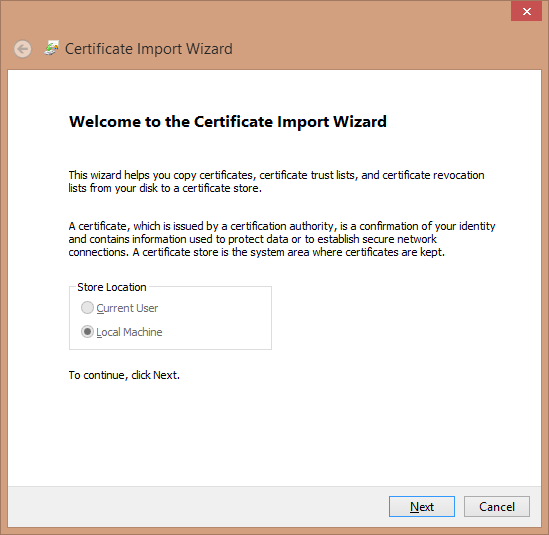
- In the Import Wizard, make sure “Local Machine” is selected and hit Next.
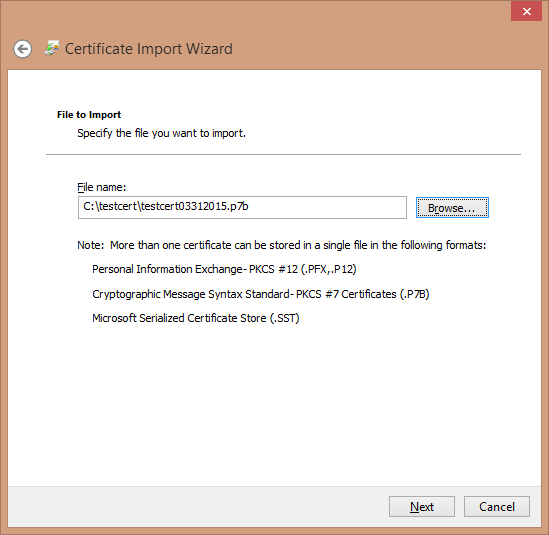
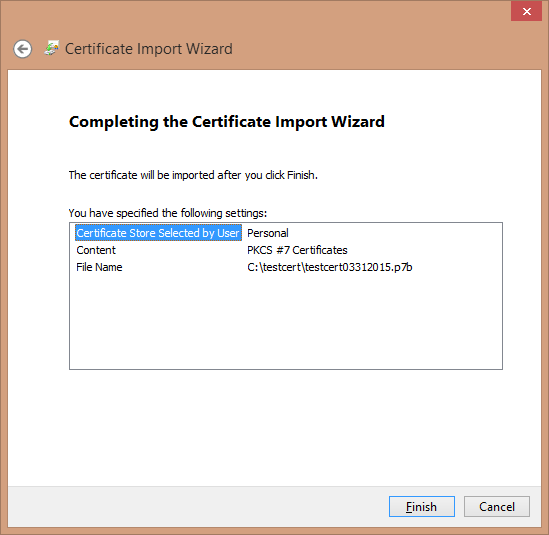
- Locate and designate the target certificate (it should be in the .p7b format), then press Next.
- Set the wizard to place the imported certificates in the “Personal” store. Hit Next to proceed.
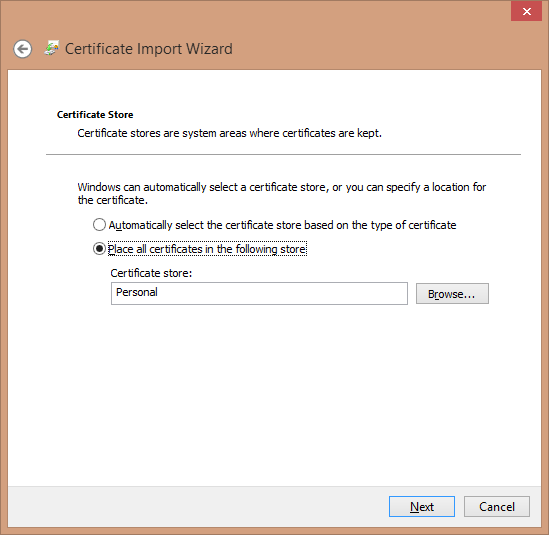
- Check the settings, then click Finish to import the certificate.
Capture the Serial Number
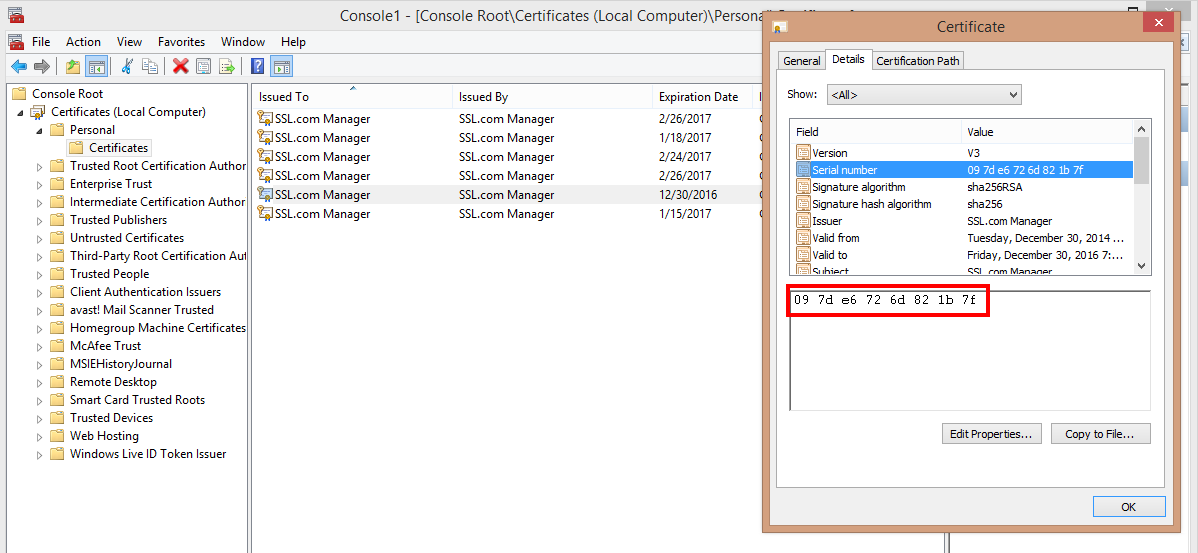
- Double-click to open the certificate, then select the “Details” tab to find and capture the serial number.
Run the certutil Program
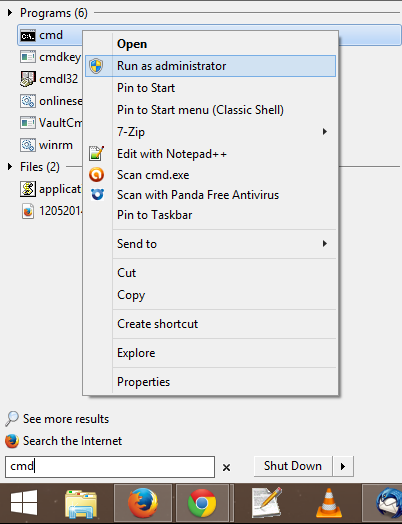
- In order to perform the next step, you will need to open a command line session with administrator privileges. The most straightforward way to do this is to perform a search for “cmd”, then right-click the cmd icon and select “Run as administrator”. (Choose “Yes” if asked if you wish to allow this program to make changes on the computer.)
- At the command line, enter the following command, using your captured serial number:
certutil -repairstore my "PLACE_SERIAL_NUMBER_HERE"
Make certain and place the serial number between the quote marks as shown. **It is best to actually type the serial number as the paste function can sometimes lose a character in the cmd window.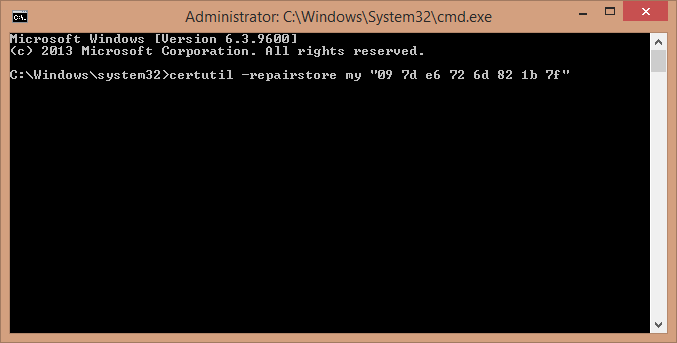
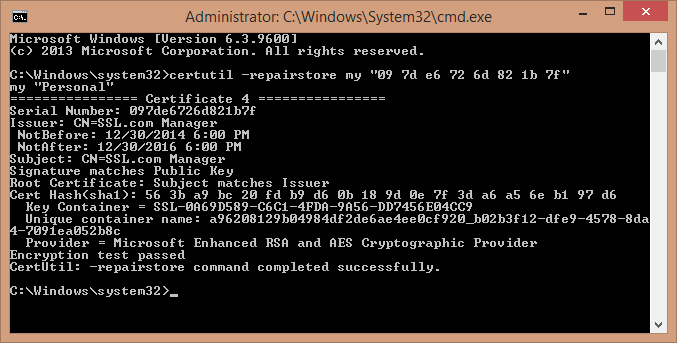
- If successful, this command will return some information about the certificate and a confirmation message.
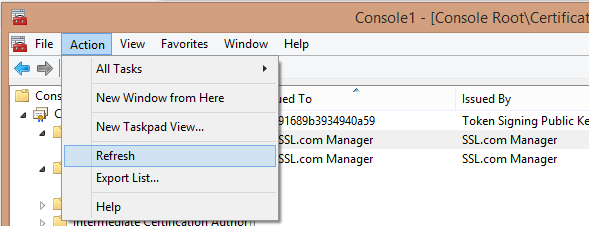
- Close the command session and refresh MMC.
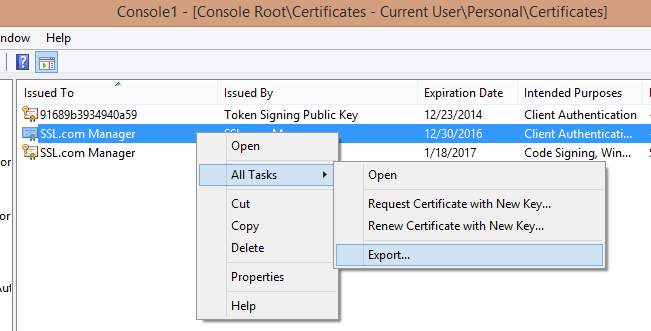
Export the Corrected Certificate
- Right-click the certificate and select “All tasks > Export” to open the Certificate Export Wizard.
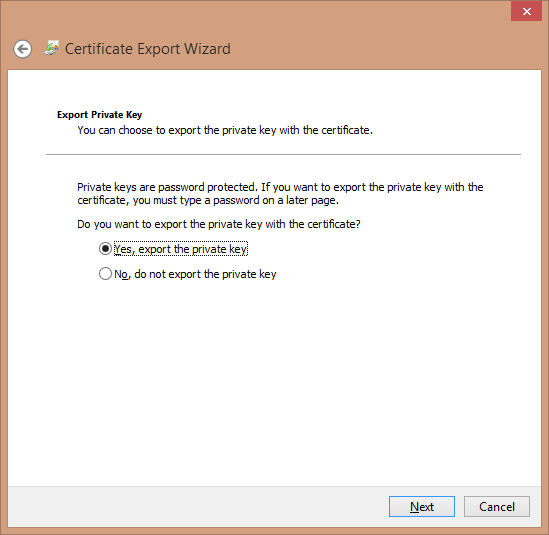
- After clicking through the Wizard’s welcome page, make sure that the option is set to “Yes, export the private key” and click Next.
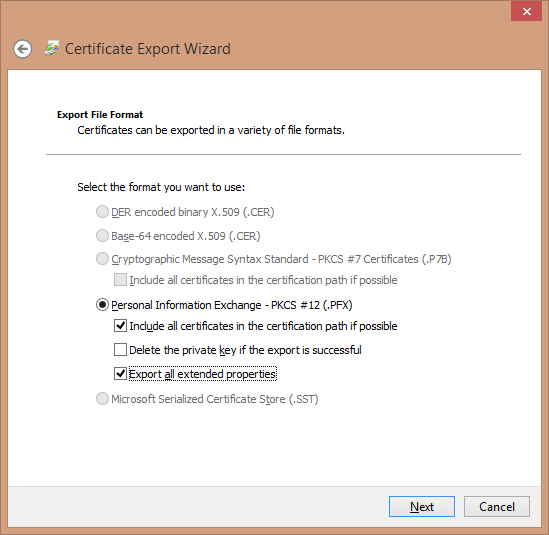
- Choose the format for the exported certificate (here, a PKCS # 12 -encoded, or .PFX file). Make sure to check the boxes to include all certificates in the path and to export all extended properties, then click Next.
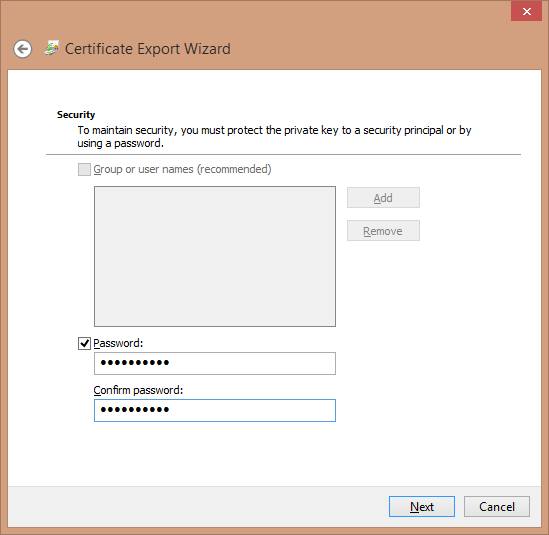
- You will be prompted for a password to protect this certificate bundle (a good idea, since it incorporates your private key). Create and confirm your password, then click Next.
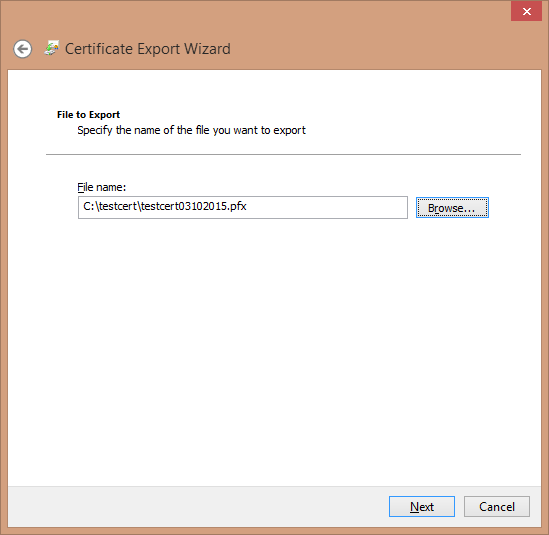
- Select the name and location of the file you are exporting. You may browse to a location you prefer – make sure to save the file with the .pfx extension.Note: Including the date is a good way to differentiate this certificate file from other ones.
- Review the information. If this all looks correct, click Finish.
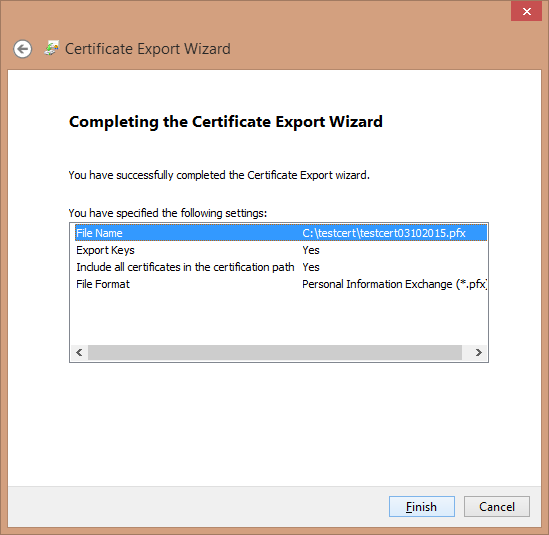
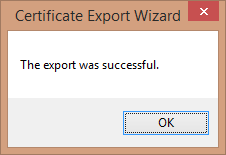
- You will receive confirmation that the export was successful.
Re-importing the Certificate with IIS
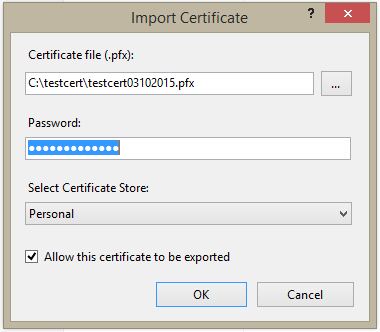
You will now have a file you can re-import via IIS without throwing the “No Private Key” error. SSL.com has general instructions on how to do this in a separate article here. For our purposes, just remember to choose “Import” instead of “Complete Certificate Request” when processing this certificate and to enter the password when prompted.
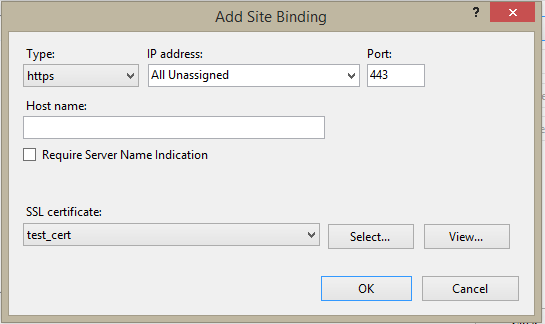
Remember also to set the Type to “https” and the Port to “443” (unless otherwise instructed by your network administrator) when binding the certificate to the site.