Showing posts with label Solr. Show all posts

Installing Solr on Ubuntu

Apache Solr is an open source search platform written on Java. Solr provides full-text search, spell suggestions, custom document ordering and ranking, Snippet generation and highlighting. This tutorial will help you to install Apache Solr 7.5 on Ubuntu 18.10, 18.04, 17.10, 16.04, 14.04 systems.

Step 1 – Verify Java

Apache Solr 7 required Java 8 or greater to run. Make sure your system fulfill Java requirements of Apache Solr. If you don’t have java installed on your system visit below articles.
java -version

java version "1.8.0_144"
Java(TM) SE Runtime Environment (build 1.8.0_144-b01)
Java HotSpot(TM) 64-Bit Server VM (build 25.144-b01, mixed mode)
If you don’t have java installed, Use this tutorial to install Java.

Step 2 – Install Apache Solr on Ubuntu

Now download the required Solr version from its official site or mirrors. Or simply use the following command to download Apache Solr 7.5.0.
cd /opt
wget http://www-eu.apache.org/dist/lucene/solr/7.5.0/solr-7.5.0.tgz
Now extract Apache Solr service installer shell script from the downloaded Solr archive file and run the installer using following commands.
tar xzf solr-7.5.0.tgz solr-7.5.0/bin/install_solr_service.sh --strip-components=2
sudo bash ./install_solr_service.sh solr-7.5.0.tgz

Step 3 – Start / Stop Solr Service

Solr is configured as a service on your system. You can simply use the following commands to Start, Stop and check the status of Solr service.
sudo service solr stop
sudo service solr start
sudo service solr status

Step 4 – Create First Solr Collection

After successful installation of Solr on your system. Create the first collection in Apache Solr using the following command.
sudo su - solr -c "/opt/solr/bin/solr create -c mycol1 -n data_driven_schema_configs"
Sample output:
Created new core 'mycol1'

Step 5 – Access Solr Admin Panel

Default Solr runs on port 8983. You can access Solr port in your web browser and you will get Solr dashboard.
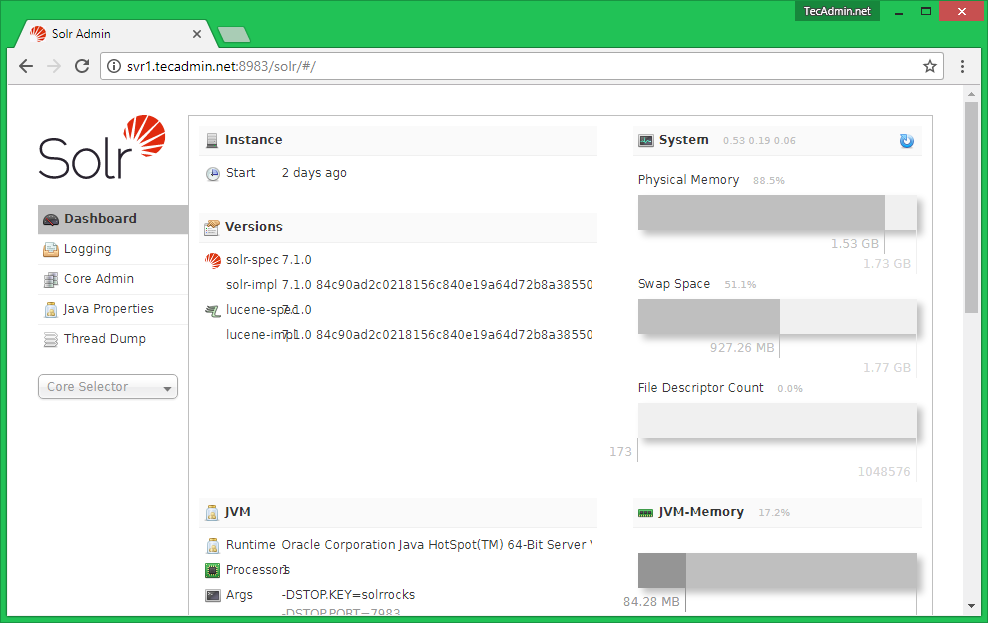
  http://svr1.tecadmin.net:8983/
Install Apache Solr - Dashboard
Here you can view statics of created collection in previous steps named “mycol1”. Click on “Core Selector” on the left sidebar and select created collection.
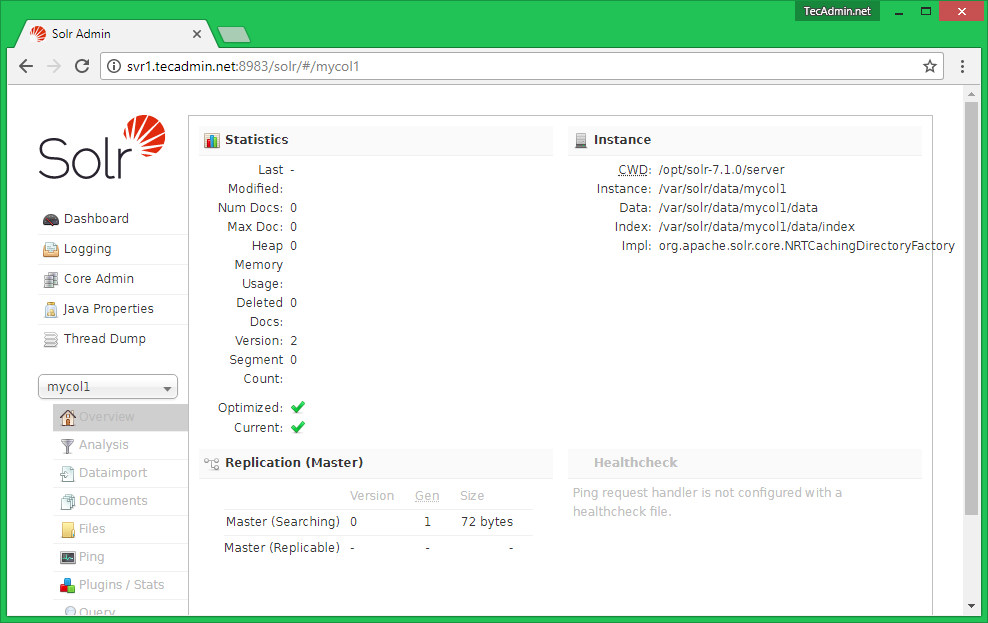
Install Apache Solr - Collection

Installing Java on Ubuntu 18.04/16

There are two standard types of installation available are JDK and JRE. JDK (Java Development Kit) provides the ability to develop a new Java application, which includes Java compiler. JRE (Java Runtime Environment) provides the runtime environment for any Java application with applets. The Java developers required to install JDK and JRE both on their system to create new Java Applications.
IMPORTANT: The Oracle Java 8 is no longer available to download publically. You can use below link to install Java 11. You may also continue to this tutorial to install OpenJDK 8.
Use this tutorial to install OpenJDK Java 8 on Ubuntu 19.10, 18.04 LTS, 16.04 LTS, LinuxMint 19, 18 using PPA. Follow the below steps to install Java 8 on Ubuntu via the command line.

Step 1 – Install Java 8 on Ubuntu

The OpenJDK 8 is available under default Apt repositories. You can simply install Java 8 on an Ubuntu system using the following commands.
Run below commands to install Java 8 on Ubuntu and LinuxMint.
sudo apt update
sudo apt install openjdk-8-jdk openjdk-8-jre

Step 2 – Verify Java Inatallation

After successfully installing Oracle Java 8 using the above steps, Let’s verify the installed version using the following command.
java -version

openjdk version "1.8.0_222"
OpenJDK Runtime Environment (build 1.8.0_222-8u222-b10-1ubuntu1~18.04.1-b10)
OpenJDK 64-Bit Server VM (build 25.222-b10, mixed mode)

Step 3 – Setup JAVA_HOME and JRE_HOME Variable

After installing Java on Linux system, You must have to set JAVA_HOME and JRE_HOME environment variables, which is used by many Java applications to find Java libraries during runtime. You can set these variables in /etc/environment file using the following command.
cat >> /etc/environment <
All done, you have successfully installed Java 8 on a Linux system. You may also need to install Tomcat server to run your Java web application. Use our another tutorial to Install Tomcat 7 or Install Tomcat 8 or Install Tomcat 9 on Ubuntu, Debian, and LinuxMint systems.

Installing Solr 6 as a Windows web service

Install on the windows platform

https://nssm.cc/download

Install Java

http://www.oracle.com/technetwork/java/javase/downloads/jre8-downloads-2133155.html

Goal

Get Solr 6.1 running as a Windows Service and have it recover on OutOfMemory Exceptions.

Install Solr 6.1 as a Service

  1. Download NSSM
  2. Extract nssm.exe somewhere
  3. Create solr_start_6.1.0.cmd (this is a Windows Command file that does all of my configuration--yours will definitely be different):
    C:\apache\solr-6.1.0\bin\solr start -f -h node3 -c -p 8983 -z "zk1:2181,zk2:2181,zk3:2181" -m 128m -s C:\apache\solr-6-cores
    NOTE: The -f to run the script in the foreground.  I set the JVM heap size to 128 MB (we want this thing to crash and burn to test out OutOfMemoryException restart!).
  4. Test your script to make sure it starts solr and you can access your Solr Admin UI in a web browser
  5. Open a command window and navigate to your nssm.exe directory
  6. nssm.exe install "Apache - Solr 6.1"
    1. Application Tab
      1. Path: Select your solr_start_6.1.0.cmd from earlier
      2. Startup Directory: set it to the directory containing your script (should populate by default)
    2. Details Tab
      1. Display Name: Apache - Solr 6.1
      2. Startup type: Automatic
    3. Log on Tab
      1. Make sure you specify an account that has administrator-level permissions (Use your account if you're stuck here--but make sure to set it to something production-worthy later)
    4. I/O Tab
      1. I/O Redirection
        1. Output (stdout): Set this to something like path\to\my\solr\cmd\script\dir\solr-6.1.0-out.txt
        2. Error (stderr): path\to\my\solr\cmd\script\dir\solr-6.1.0-error.txt
      2. File rotation
        1. Check Rotate files
        2. Check Rotate while service is running
        3. Restrict rotation to files bigger than: (use common sense here, I did 5 MB, so 5242880 went into the box)
    5. Click Install Service
  7. Open Component Services and select Apache - Solr 6.1
  8. Start the service
  9. Validate that it came up by going to your Admin UI webpage

    Make Solr Service respond to Out Of Memory Exceptions

    1. Navigate to this JIRA ticket
    2. Download oom_win.cmd and place it in your solr\bin directory next to solr.cmd
    3. Open solr.cmd in a text editor
    4. Find all the places where the script starts the server:
      1. Search for /solr_gc.log
    5. Immediately after /solr_gc.log, paste the following:
      -XX:OnOutOfMemoryError="%SOLR_SERVER_DIR%\..\bin\oom_win.cmd %SOLR_PORT% !SOLR_LOGS_DIR!"
      1. I had to replace two lines.  NOTE that this is just the manual way of applying the patch file associated with the JIRA ticket above.  If you want, apply it however you want.
    6. Now that we've made our changes, go ahead and restart our new Solr 6.1 service so it knows to kill the process on OutOfMemory errors.
    7. To force an OutOfMemoryError, query *:* and return 1000000 rows
      1. If you have a decent amount of content, this should force an OutOfMemory exception.  If you don't have a lot of content, do whatever you can to make it do a lot of memory-intensive work.  Perhaps consider lowering the JVM memory, too.
      2. You should see the web server go offline temporarily and then come back online
    8. Now that you've seen it restart and come back online, let's give the JVM a good amount of RAM so that it doesn't run out of memory every other request.  Just edit your solr_start_6.1.0.cmd file and change the -m 128m to -m 4g (128 MB to 4 GB)
    9. Save and restart the service
    10. Confirm that you have the new amount of RAM for the JVM by visiting the Dashboard tab in the Admin UI

    Logs

    When the OutOfMemory Killer runs, it generates a log file in the normal log directory.  Navigate to that directory and you should see a file that looks something like: solr_oom_killer-9000-2016-07-06_13_59_39.  Now you can know when this script runs and hopefully anticipate it in the future or make changes to not get it.